Recover lost datafile on Standby with rman
Here we have same issue, I have lost one datafile file from my Standby database,
this solution is diff from last one ,in this we use rman backup copy of lost
datafile from Standby ,no need to change Standby_file_management to manual
Primary Database =AUS
Standby Database= AUSSTBY
Lost datafile no is 4;
On Primary :-
SQL> select name from v$datafile_header;
NAME
--------------------------------------------------------------------------------
+DATA/data01.dbf
+DATA/undo.dbf
+DATA/data02.dbf
+DATA/tbs01.dbf
On Standby :-
SQL> select name from v$datafile_header;
NAME
--------------------------------------------------------------------------------
+DATA01/data01.dbf
+DATA01/undo.dbf
+DATA01/data02.dbf
tbs01.dbf it missing on Primary
contents of alert log from Standby :-
alter database recover managed Standby database disconnect from session
Sun Nov 11 00:09:40 2012
Attempt to start background Managed Standby Recovery process (AUSSTBY)
MRP0 started with pid=22, OS id=7842
Sun Nov 11 00:09:41 2012
MRP0: Background Managed Standby Recovery process started (AUSSTBY)
Managed Standby Recovery not using Real Time Apply
Sun Nov 11 00:09:46 2012
Errors in file /opt/oracle/database/AUSSTBY/bdump/AUSSTBY_dbw0_5501.trc:
ORA-01157: cannot identify/lock data file 4 - see DBWR trace file
ORA-01110: data file 4: '+DATA01/tbs01.dbf'
ORA-17503: ksfdopn:2 Failed to open file +DATA01/tbs01.dbf
ORA-15173: entry 'tbs01.dbf' does not exist in directory '/'
MRP0: Background Media Recovery terminated with error 1110
Sun Nov 11 00:09:46 2012
Errors in file /opt/oracle/database/AUSSTBY/bdump/AUSSTBY_mrp0_7842.trc:
ORA-01110: data file 4: '+DATA01/tbs01.dbf'
ORA-01157: cannot identify/lock data file 4 - see DBWR trace file
ORA-01110: data file 4: '+DATA01/tbs01.dbf'
Sun Nov 11 00:09:46 2012
Errors in file /opt/oracle/database/AUSSTBY/bdump/AUSSTBY_mrp0_7842.trc:
ORA-01110: data file 4: '+DATA01/tbs01.dbf'
ORA-01157: cannot identify/lock data file 4 - see DBWR trace file
ORA-01110: data file 4: '+DATA01/tbs01.dbf'
Sun Nov 11 00:09:46 2012
MRP0: Background Media Recovery process shutdown (AUSSTBY)
on Primary :- connect with rman on Primary and take to backup of datafile 4 as copy
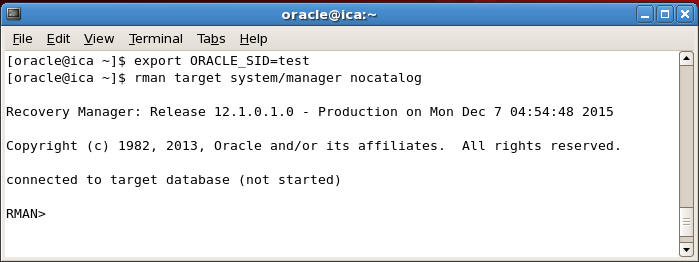
[oracle@Host1 ~]$ rman target sys/singh@AUS
Recovery Manager: Release 10.2.0.1.0 - Production on Sun Nov 11 04:06:57
2012
Copyright (c) 1982, 2005, Oracle. All rights reserved.
connected to target database: AUS (DBID=980646045)
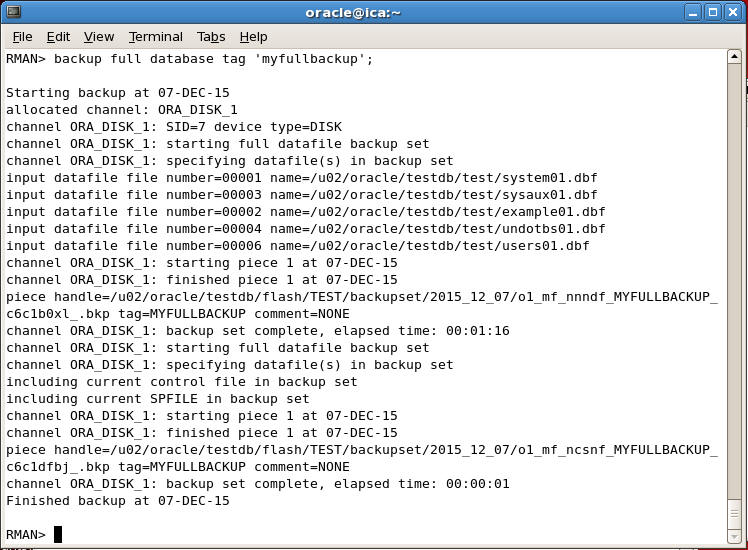
RMAN> backup as copy datafile 4 format='/opt/oracle/%U.bak' tag='lost
file backup';
Starting backup at 11-NOV-12
using target database control file instead of recovery catalog
allocated channel: ORA_DISK_1
channel ORA_DISK_1: sid=28 devtype=DISK
channel ORA_DISK_1: starting datafile copy
input datafile fno=00004 name=+DATA/tbs01.dbf
output filename=/opt/oracle/data_D-AUS_I-980646045_TS-TBS_FNO-4_0rnq0qfj.bak
tag=LOST FILE BACKUP recid=2 stamp=799042039
channel ORA_DISK_1: datafile copy complete, elapsed time: 00:00:07
Finished backup at 11-NOV-12
RMAN>
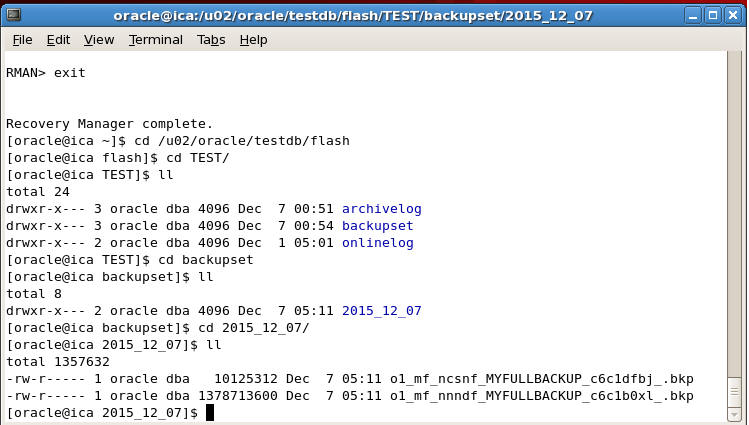
Now copy this backup copy to Standby database :
[oracle@Host1 oracle]$ ls -la
total 10304
drwxrwxr-x 6 oracle
oinstall 4096 Nov 11 04:07 .
drwxr-xr-x 6
root root 4096
Oct 27 06:35 ..
drwxr-xr-x 2 oracle
oinstall 4096 Nov 10 02:13 cdsbak
-rw-r----- 1 oracle oinstall 11003
Nov 3 00:29 AUS_lnsb_6593.trc
drwxr-xr-x 3 oracle
oinstall 4096 Oct 27 21:55 database
-rw-r----- 1 oracle oinstall 10493952 Nov 11 04:07 data_D-AUS_I-980646045_TS-TBS_FNO-4_0rnq0qfj.bak
drwxrwx--- 6 oracle
oinstall 4096 Oct 27 06:34 oraInventory
drwxr-x--- 54 oracle oinstall 4096 Oct 28
01:07 product
[oracle@Host1 oracle]$ scp data_D-AUS_I-980646045_TS-TBS_FNO-4_0rnq0qfj.bak
host2:/opt/oracle/
oracle@host2's password:
data_D-AUS_I-980646045_TS-TBS_FNO-4_0rnq0qfj.bak 100% 10MB 10.0MB/s 00:01
[oracle@Host1 oracle]$
Now in Standby Database Connect Cancel the redo apply first and then connect with rman on Standby:-
SQL> alter database recover managed Standby database cancel;
[oracle@Host2 ~]$ rman target sys/singh@AUSSTBY
Recovery Manager: Release 10.2.0.1.0 - Production on Sun Nov 11 04:08:31
2012
Copyright (c) 1982, 2005, Oracle. All rights reserved.
connected to target database: AUS (DBID=980646045, not open)
RMAN> catalog datafilecopy '/opt/oracle/data_D-AUS_I-980646045_TS-TBS_FNO-4_0rnq0qfj.bak';
using target database control file instead of recovery catalog
cataloged datafile copy
datafile copy filename=/opt/oracle/data_D-AUS_I-980646045_TS-TBS_FNO-4_0rnq0qfj.bak
recid=7 stamp=799042153
RMAN> report schema;
List of Permanent Datafiles
===========================
File Size(MB)
Tablespace RB
segs Datafile Name
---- -------- -------------------- ------- ------------------------
1 300 SYSTEM *** +DATA01/data01.dbf
2 20 UNDOCDS01 *** +DATA01/undo.dbf
3 200 SYSAUX *** +DATA01/data02.dbf
4 0 TBS *** +DATA01/tbs01.dbf
List of Temporary Files
=======================
File Size(MB)
Tablespace Maxsize(MB)
Tempfile Name
---- -------- -------------------- ----------- --------------------
1 20 TEMPCDS01 20 +DATA01/temp.dbf
RMAN> switch datafile 4 to copy;
datafile 4 switched to datafile copy "/opt/oracle/data_D-AUS_I-980646045_TS-TBS_FNO-4_0rnq0qfj.bak"
RMAN> report schema;
List of Permanent Datafiles
===========================
File Size(MB)
Tablespace RB
segs Datafile Name
---- -------- -------------------- ------- ------------------------
1 300 SYSTEM *** +DATA01/data01.dbf
2 20 UNDOCDS01 *** +DATA01/undo.dbf
3 200 SYSAUX *** +DATA01/data02.dbf
4 10 TBS *** /opt/oracle/data_D-AUS_I-980646045_TS-TBS_FNO-4_0rnq0qfj.bak
List of Temporary Files
=======================
File Size(MB) Tablespace Maxsize(MB)
Tempfile Name
---- -------- -------------------- ----------- --------------------
1 20 TEMPCDS01 20 +DATA01/temp.dbf
RMAN> copy datafile 4 to '+DATA01/tbs01.dbf';
Starting backup at 11-NOV-12
allocated channel: ORA_DISK_1
channel ORA_DISK_1: sid=18 devtype=DISK
channel ORA_DISK_1: starting datafile copy
input datafile fno=00004 name=/opt/oracle/data_D-AUS_I-980646045_TS-TBS_FNO-4_0rnq0qfj.bak
output filename=+DATA01/tbs01.dbf tag=TAG20121111T041116 recid=8
stamp=799042278
channel ORA_DISK_1: datafile copy complete, elapsed time: 00:00:03
Finished backup at 11-NOV-12
RMAN> report schema;
List of Permanent Datafiles
===========================
File Size(MB)
Tablespace RB
segs Datafile Name
---- -------- -------------------- ------- ------------------------
1 300 SYSTEM *** +DATA01/data01.dbf
2 20 UNDOCDS01 *** +DATA01/undo.dbf
3 200 SYSAUX *** +DATA01/data02.dbf
4 10 TBS *** /opt/oracle/data_D-AUS_I-980646045_TS-TBS_FNO-4_0rnq0qfj.bak
List of Temporary Files
=======================
File Size(MB)
Tablespace Maxsize(MB)
Tempfile Name
---- -------- -------------------- ----------- --------------------
1 20 TEMPCDS01 20 +DATA01/temp.dbf
RMAN> switch datafile 4 to copy;
datafile 4 switched to datafile copy "+DATA01/tbs01.dbf"
RMAN> report schema;
List of Permanent Datafiles
===========================
File Size(MB)
Tablespace RB
segs Datafile Name
---- -------- -------------------- ------- ------------------------
1 300 SYSTEM *** +DATA01/data01.dbf
2 20 UNDOCDS01 *** +DATA01/undo.dbf
3 200 SYSAUX *** +DATA01/data02.dbf
4 10 TBS *** +DATA01/tbs01.dbf
List of Temporary Files
=======================
File Size(MB)
Tablespace Maxsize(MB)
Tempfile Name
---- -------- -------------------- ----------- --------------------
1 20 TEMPCDS01 20 +DATA01/temp.dbf
RMAN>exit
Now start redo apply on Standby :-
On Standby now:-
SQL> select name from v$datafile_header;
NAME
--------------------------------------------------------------------------------
+DATA01/data01.dbf
+DATA01/undo.dbf
+DATA01/data02.dbf
+DATA01/tbs01.dbf
--------------------------------------------------------------------------------
+DATA01/data01.dbf
+DATA01/undo.dbf
+DATA01/data02.dbf
+DATA01/tbs01.dbf